Habitat TV
Featured Video
DIY buoy garland
duration:
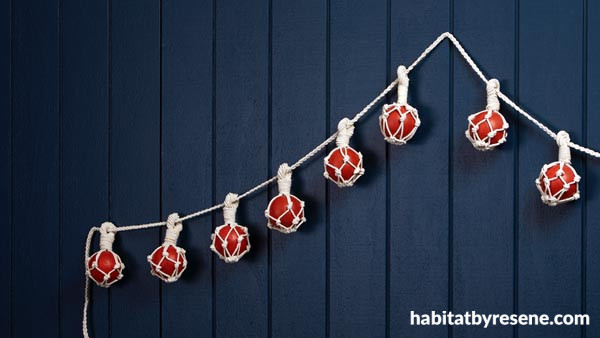
Once you wrap your head around this simple knotting technique, you’ll find it super easy – and even fun – to make more of these buoys to decorate your favourite sailor’s space. While we’ve strung ours on to a garden, they would also look great on your Christmas tree when the holidays roll around.
You will need:
- 8 or more ‘balls’ – these can be made of cardboard, glass, polystyrene, or you could even upcycle old toy balls. Ours were approximately 70mm in diameter, but you can make yours any size that suits.
- Natural cotton string/rope – like the kind used for macramé
- Measuring tape
- Scissors
- Masking tape
- Hot glue
- Testpot brush
- Resene testpots in your choice of colours – we used Resene Raging Bull
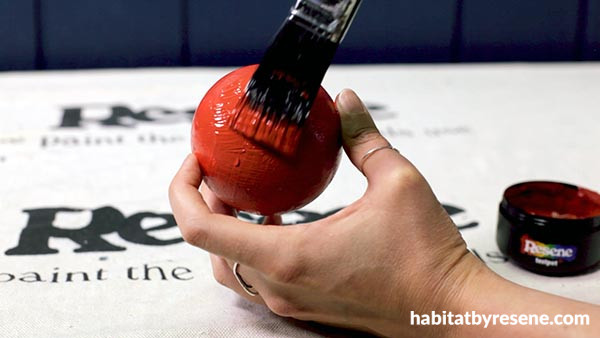
Step 1 Using a Resene testpot brush, paint your balls in two coats with a Resene testpot of your choice. We painted all of ours in Resene Raging Bull, but you could use a variety of your favourite Resene colours for a fun look. Allow the first coat of paint to dry to the touch before moving on to the second coat.
Step 2 While your second coat of paint is drying, measure and cut one longer length of cotton string and six shorter lengths. For ours, our longer length was approximately 120cm and the six shorter ones were approximately 80cm.
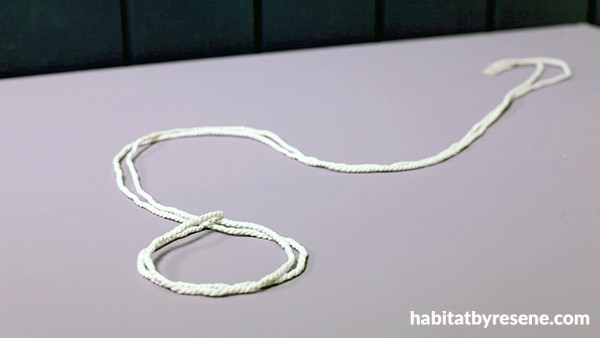
Step 3 Fold your longer length of string in half so that it creates a loop at one end. Then, keeping the two ends together, feed them through the loop and pull the lengths most of the way through, leaving a ring at the end.
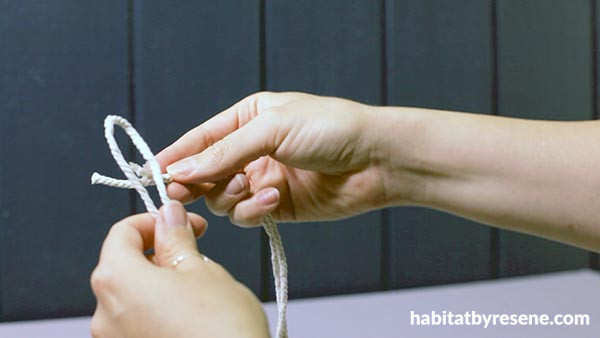
Step 4 Fold the first of your shorter lengths of string in half so that it creates a loop at one end. Then, pass the loop under your ring before feeding the two ends of your shorter length of string through the loop. Pull the ends all the way through so that your loop tightens around the ring.
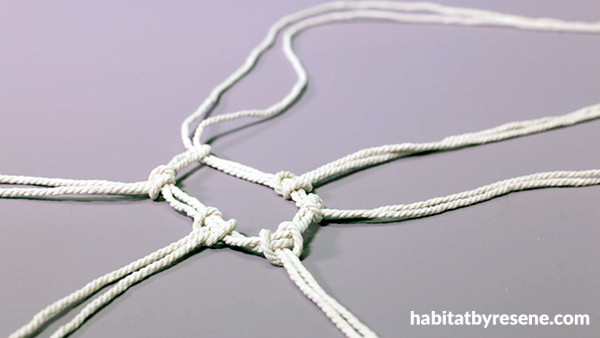
Step 5 Repeat Step 4 for the remaining shorter lengths of string so that all six are looped around your first ring. Slide them against one another and tighten the original ring so that all your strings splay out in a circle like a starburst.
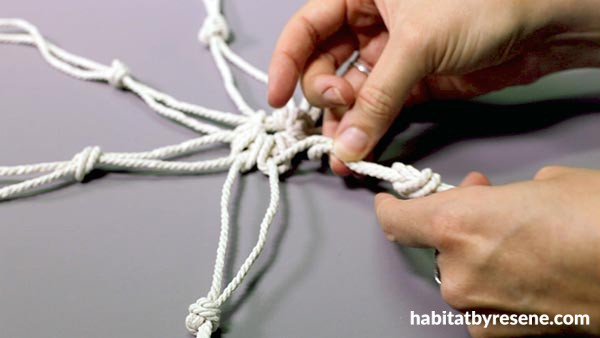
Step 6 Take the left side of one string and the right side of the string next to it and knot them together around your finger so that the knot lays approximately 3cm out from the centre ring. Working around the circle, do the same to each left string, so that it is tied together with the one immediately to the right of it.
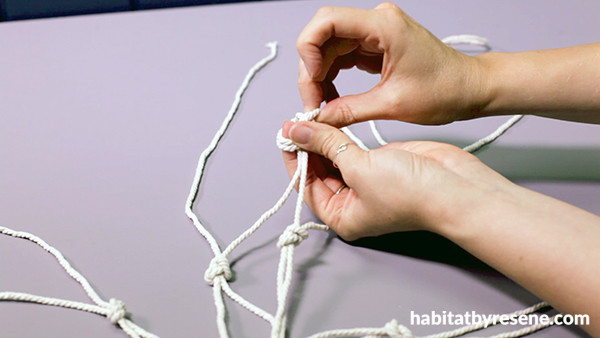
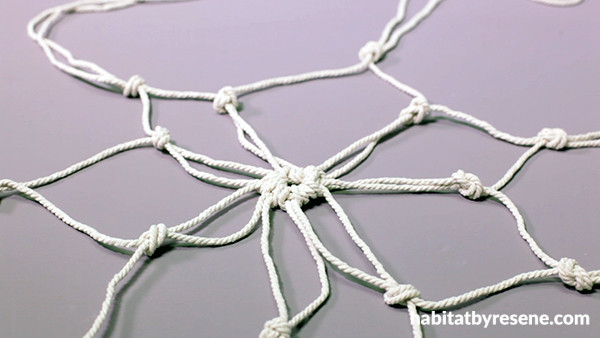
Step 7 Repeat Step 6 again another 3cm out from the first set of knots, once again tying each ‘left’ string to the one immediately to the right of it. If you’ve kept everything orderly, your knotting should have formed a circular net.
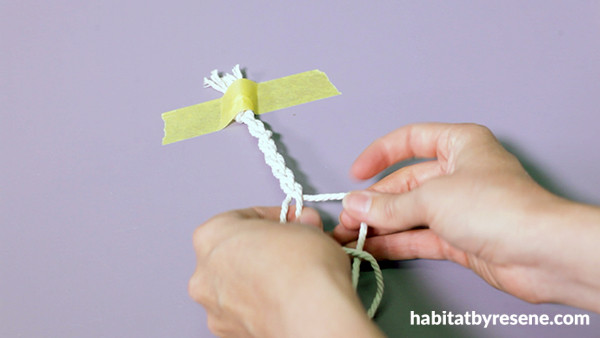
Step 8 Measure three equal lengths of cotton string approximately 20% longer than the distance you would like your garland to drape across. For example, if you want your garland to drape over a queen-sized headboard – which usually measures a little over 152cm wide – cut your three lengths approx. 182cm long. Knot them together at the top and tape the knot to the surface of a table. Braid your three strands into a simple plait, alternating which side you grab your string from and bringing it between the two remaining strings. When you reach the end of your lengths, knot them together.
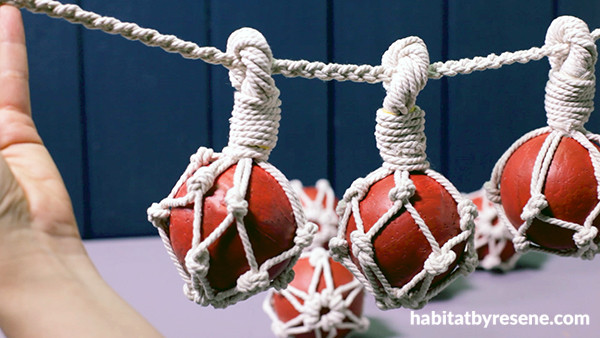
Step 9 Thread your plaited ‘rope’ through the holes at the tops of the buoys, sliding them along so that their spaced evenly across. If your buoys are made of a light material, they should stay in place on their own. But if they are made of a heavier material, such as glass, it’s a smart idea to either tie a knot in your rope on either side of each buoy on secure them in place with hot glue. Then, use your new garland to decorate a headboard, drape it across the top of a window frame or above a desk.
Category: create with paint
Published on Sep 24, 2020
Latest Habitat TV Videos:

Published 1 year 3 months ago
Say goodbye to the morning scramble for keys, coats and sunglasses and hello to this…

Published 1 year 3 months ago
Entryways are usually the first impression visitors have of your home interior. This DIY organiser…


