
latest
habitat tv

Say goodbye to the morning scramble for keys, coats and sunglasses and hello to this… see this and more videos
blog

Reader roundup: Happy dogs, custom colours and a small Resene fan
We love to share what you have been up to with Resene paints and products!… more
These DIY feathered friends are a hoot!
04 May 2023
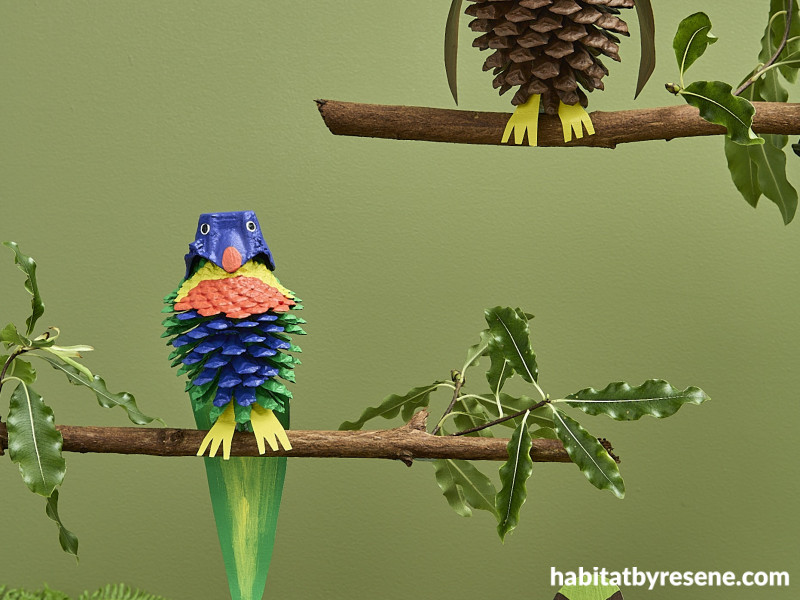
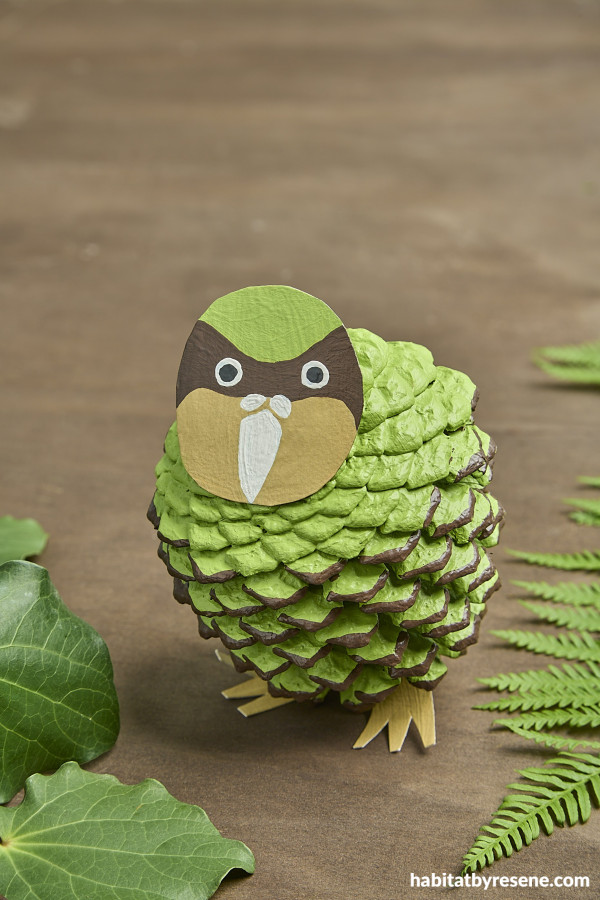
These kākāpō, rainbow lorikeet and ruru birds will be a hoot for the kids to make using pinecones and their favourite Resene colours. Not only are they a sustainable choice for an art project, but they are also a fun way for children to learn about our native birds. As seen in habitat issue 38, here is the step-by-step guide to making your own feathery friends.
You will need:
- Cardboard for the kākāpō head, ruru wings, lorikeet tail feather and each bird’s feet
- Egg carton for the rainbow lorikeet head
- Buttons for the ruru eyes
- Scissors
- Blu-Tack (or a hot glue gun with an adult’s help)
- Small paintbrush
- Drop cloth
- Clean rag
- Resene testpots in your choice of colours. We used:
Karrie the kākāpō:Resene Sushi, Resene Rebel, Resene Teak, Resene Half Blanc, Resene Black and Resene White.
Lottie the rainbow lorikeet: in Resene Japanese Laurel, Resene Deep Koamaru, Resene Pursuit, Resene Black, Resene White and Resene Happy.
Rolly the ruru: in Resene Waterborne Woodsman Dark Oak, Resene Lone Ranger and Resene Happy. Wall in Resene Woodland and table in Resene Woodsman Dark Oak.
To make Karrie the kākāpō:
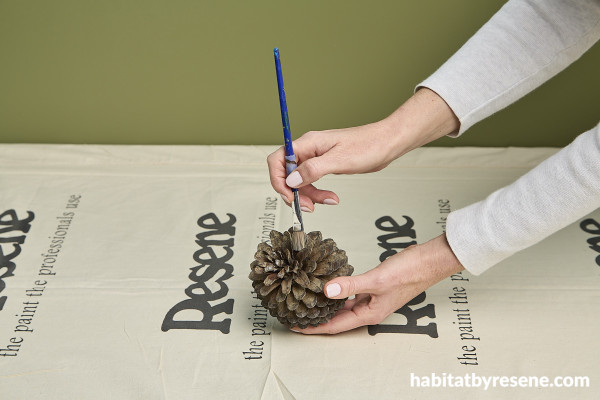
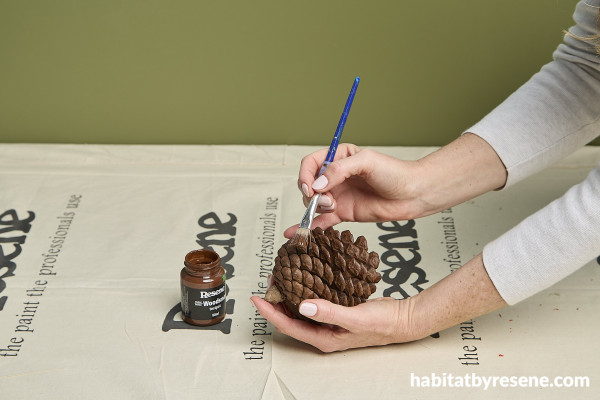
Step 1: Clean any dirt from your pinecone using a small paintbrush.
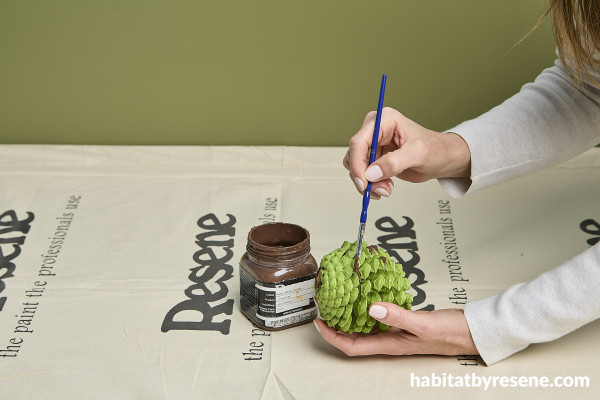
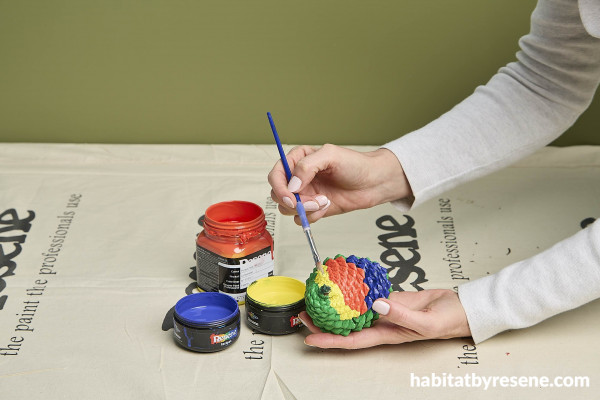
Step 2: Apply two coats of Resene colour to the entire pinecone. We used Resene Sushi. Using a small brush, paint the tips of the pinecone scales in a darker colour. We used Resene Rebel.
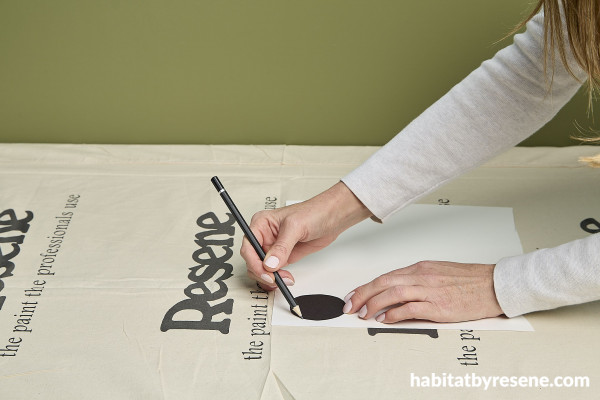
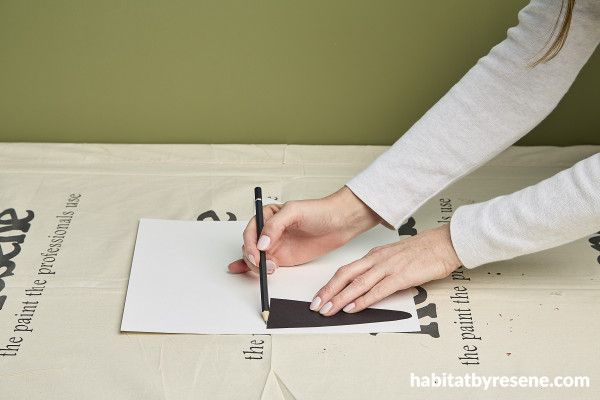
Step 3: Cut a round face shape out of cardboard.
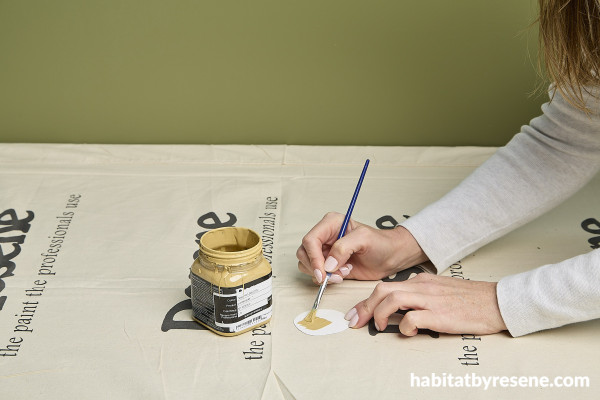
Step 4: Apply a base colour to the shape. We used Resene Teak.
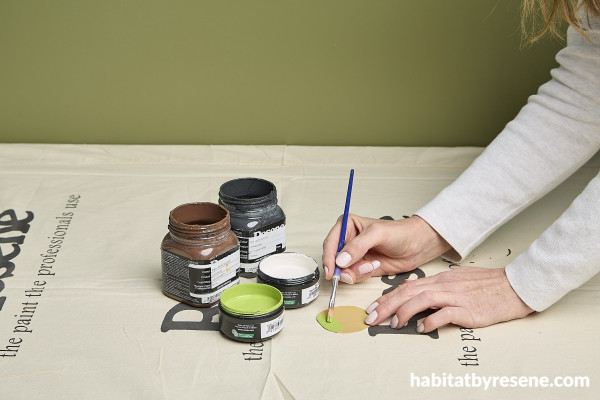
Step 5: Once dry, paint features in your chosen colours. We used Resene Sushi and Resene Rebel for the face, Resene Half Blanc for the beak and Resene Black and Resene White for
the eyes.
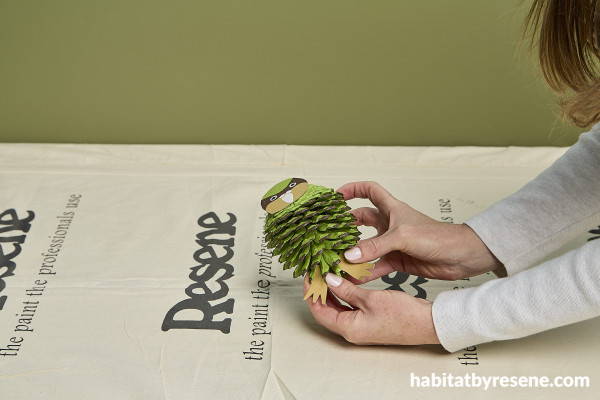
Step 6: Draw the outline of two feet on a piece of cardboard. Cut out both feet, then paint them. We used Resene Teak. Secure the face and feet using Blu-Tack or a hot glue gun with an adult’s help.

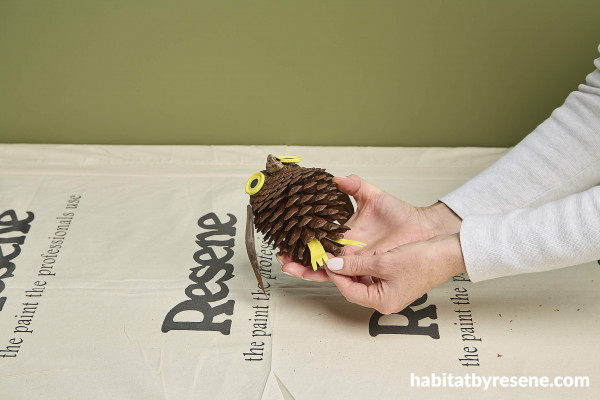
To make Lottie the lorikeet:
Step 1: Clean any dirt from your pinecone using a small paintbrush.
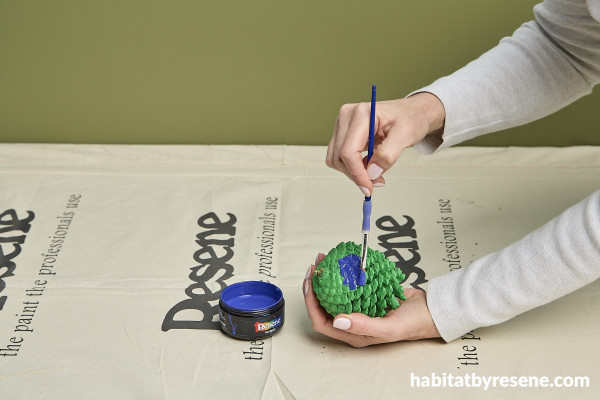
Step 2: Paint a basecoat. We used Resene Japanese Laurel. Using a small paintbrush, apply two coats of a different colour to the lower section of the pinecone for the belly. We used Resene Deep Koamaru.
Step 3: Once dry, paint the lorikeet’s chest. We used two coats of Resene Pursuit and Resene Happy.
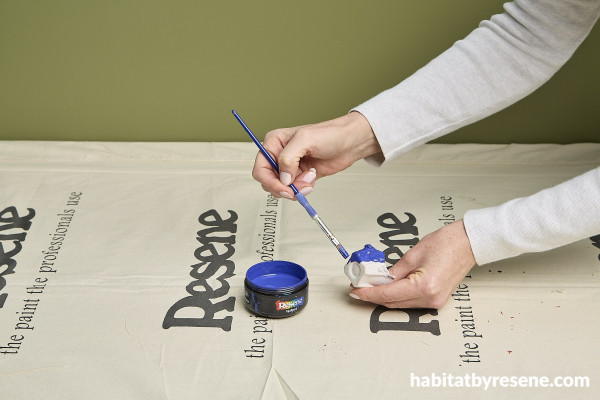
Step 4: To make the lorikeet’s head, cut a cup from an egg carton. Cut out a triangular shape at the front of the egg cup to resemble a beak. Paint the head in two coats of the belly colour. We used Resene Deep Koamaru with eyes in Resene White and Resene Black. Paint an oval shape on the front of the beak. We used Resene Pursuit.
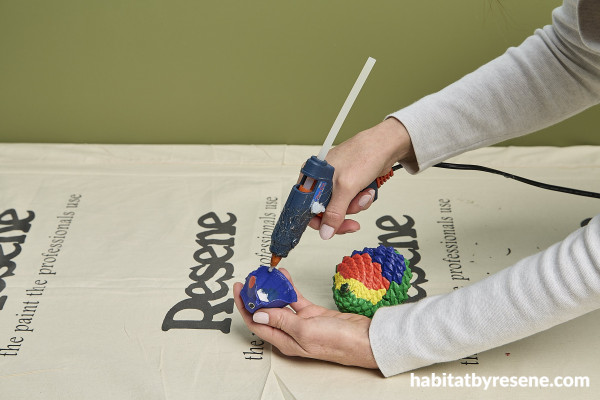
Step 5: Attach the head to the lorikeet with Blu-Tack or a glue gun. Apply to the underside so it’s not visible.
Step 6: Draw the outline of two feet and a tail feather on to cardboard and cut out.
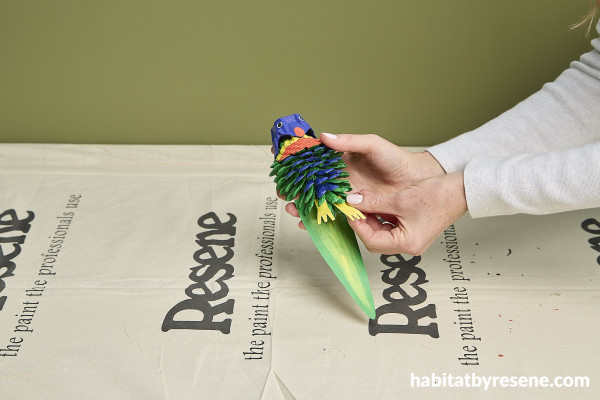
Step 7: Paint your cardboard pieces. We used Resene Japanese Laurel and Resene Happy for the tail and Resene Happy for feet. Secure the tail feather to the back of the pinecone and the feet to the bottom, pushed up between the pinecone scales.
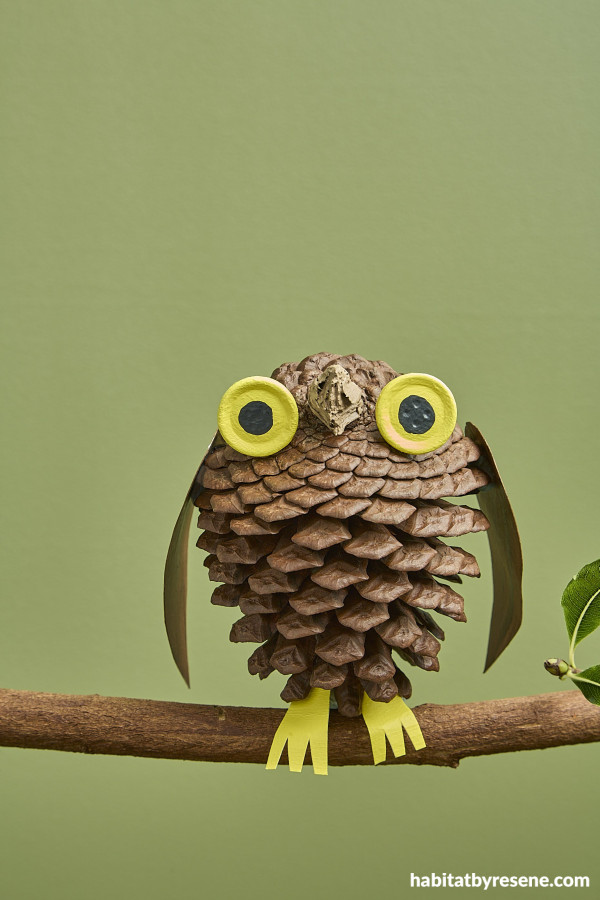
To make Rolly the ruru:
Step 1: Clean your pinecone using a small paintbrush.
Step 2: Using a small paintbrush, apply one coat of Resene Waterborne Woodsman wood stain. We used Resene Dark Oak. Leave to dry then gently buff off any excess stain with a clean rag.
Most pinecones have a wooden stem which can work as a beak. If your pinecone doesn’t have a stem, cut out a small triangular piece of cardboard and stick to the pinecone. Paint the beak with two coats of colour. We used Resene Lone Ranger.
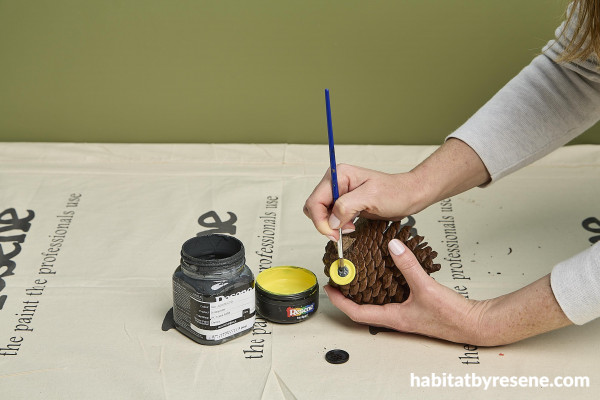
Step 3: Paint two buttons with two coats of eye colour, allowing them to dry between coats. We used Resene Happy and Resene Black for the pupils. Attach to the pinecone with Blu-Tack or glue.
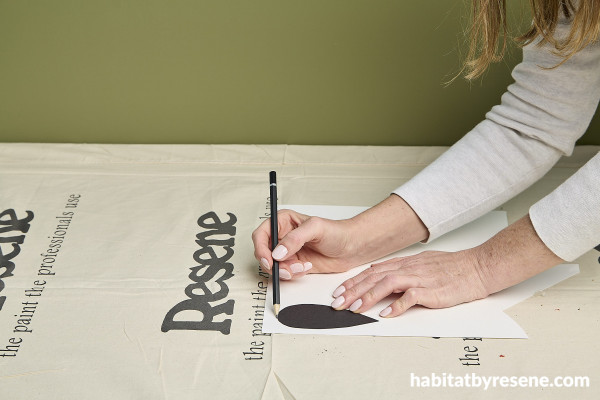
Step 4: Draw two teardrop shapes onto cardboard for wings and cut out.
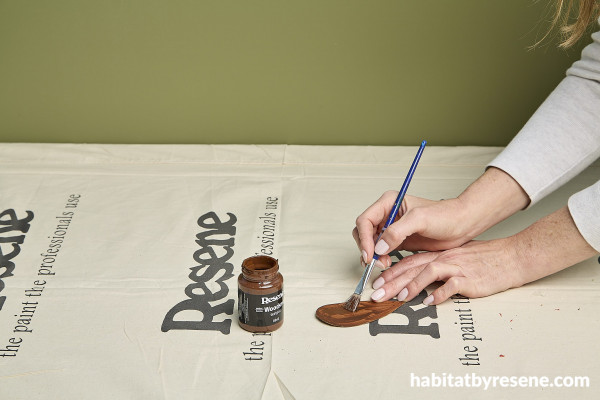
Step 5: Apply the same shade of Resene Waterborne Woodsman to the wings, using loose brushstrokes for a textured effect. Do both sides, allowing them to dry in between.
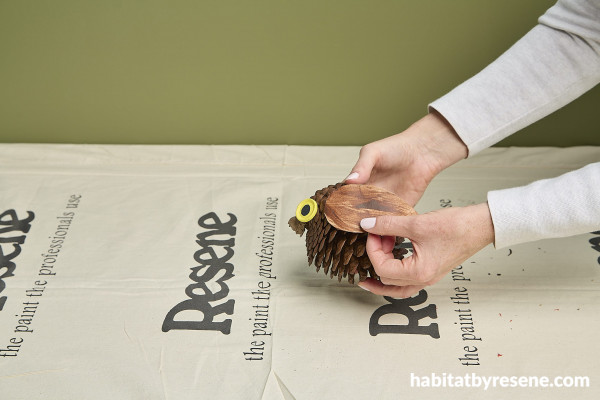
Step 6: Bend the wings to create a curve and attach to the sides of the ruru with Blu-Tack or glue.
Step 7: Draw the two feet onto a piece of cardboard, cut out and paint. We used Resene Happy. Attach to the bottom of the pinecone with Blu-Tack.
project Shani Luckman
images Bryce Carleton
Published: 04 May 2023
more inspiration

Hues on the move: A DIY rainbow mobile
Get ready to add a vibrant touch to your nursery,… more

Show your support this ANZAC Day with this DIY wreath
Anzac Day is a national day of remembrance in New… more

Sunny side up: Bookends for any weather
Brighten up your bookshelf and organise your books at the… more

A roar-some dish: DIY animal plates
Impress your guests with these DIY animal plates! The Resene… more

Glowing zoofari: Make your own animal themed lamp
Here’s a great DIY to do with the kids over… more


 look book