
latest
habitat tv

Say goodbye to the morning scramble for keys, coats and sunglasses and hello to this… see this and more videos
blog

Whakawhitinga: A mural of passage and connection at the Dunedin School of Art
At Dunedin School of Art, artist Sarah Viault’s mural ‘Whakawhitinga’ brings to life a profound… more
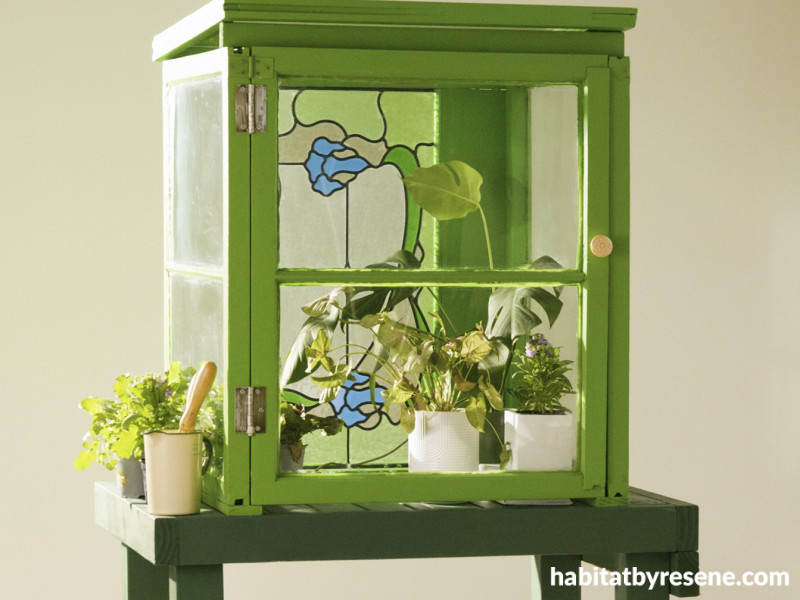
Let’s get glassy: A DIY guide to make your own mini glasshouse
24 Oct 2023
Building your own glasshouse need not be a daunting task, and the end result is a lush and rewarding addition to your exterior garden or patio. Using recycled windows of equal size makes the task a whole lot easier! We’ve used a stained glass window in this project. If you have a stained glass window you’d like to use but which isn’t the same size as your other windows, simply make a frame that matches those dimensions. Note that given the nature of old windows, they may not match exactly, so you may need to adjust your measurements to suit.
You will need:
- 4 recycled windows, equally sized
- 1 recycled window, for the roof
- Large side table or outdoor bench
- 65mm x 18mm treated radiata board (the length of 3 x windows – the side and back windows)
- Timber offcut 35mm x 70mm (or similar) x width of glasshouse (used as brace)
- Recycled knob or handle
- 2 galvanised hinges
- 6 x 35mm countersunk wood screws
- 6 x 50mm countersunk wood screws
- 15 x 65mm countersunk wood screws
- 4 x 75mm countersunk wood screws
- 1 litre Resene Lumbersider in each of your chosen colours. We used Resene Bush and Resene Bilbao
- Paintbrush
- Masking tape
- 220 grit sandpaper
- Drill + bits
- Saw
- Pencil
- Measuring tape
- Clean rags
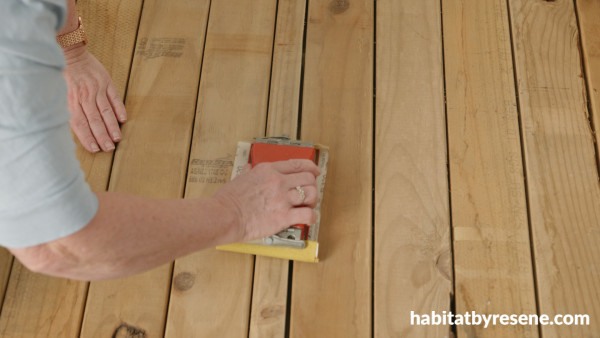
Step 1: Sand the window frames and table with 220 grit sandpaper to smooth out any rough edges and to allow the paint to grip.
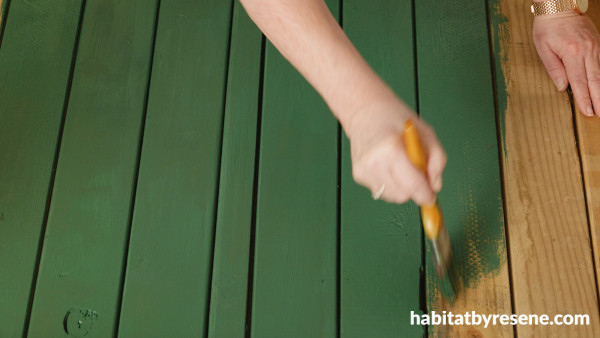
Step 2: For the table, apply two coats of your chosen Resene paint colour, allowing time to dry between each coat. We used Resene Bush.
Step 3: Cut the 65mm x 18mmradiata board into three equal sizes (the length of your windows). Using 65mm screws, screw one piece to the bottom of one of the side windows, first drilling pilot holes, and positioning the board so the overhang is on the inside of the glasshouse. (You will screw this board into the table to hold the glasshouse in place.) Repeat for your second window – also a side window – positioning a radiata board at the base, with the overhang on the inside.
Step 4: For the back window, cut an indent at each end of the board, as shown, to allow the side panels to slot together. The indent will match the width of the panel, 65mm. As our back window is slightly shorter than our side windows, there is a small overhang at each end. Fix the board, with screws, to the base of the window, with the overhang on the inside.
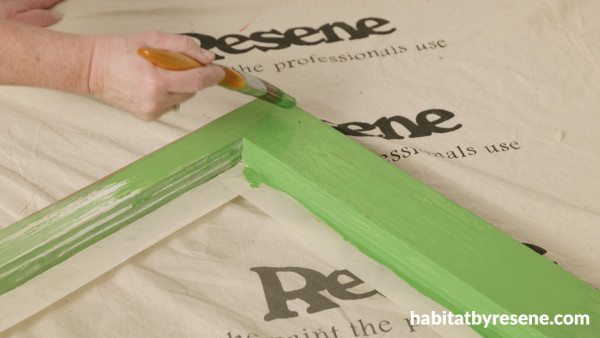
Step 5: Apply masking tape to the inside of each window to protect the glass, then paint the window frames of all five windows with two coats of your chosen Resene paint colour, allowing dry time between coats. We used Resene Bilbao.
Step 6: Place the two side windows on their sides and position the back window on top to form a box shape. Drill pilot holes then, using three 65mm screws for each side (depending on the thickness of the window frames, you may need longer screws), screw the back window to the side windows.
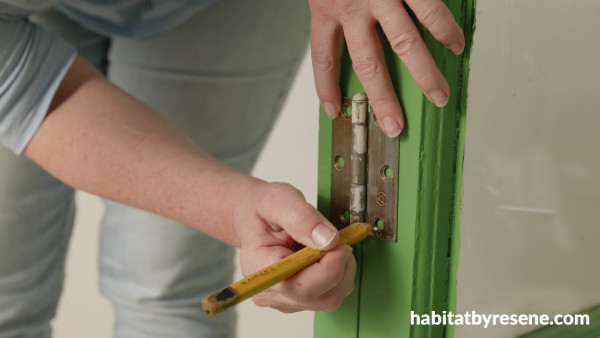
Step 7: Turn the glasshouse right side up. Position the ‘door’ in place and, using a pencil, mark where the hinges will go. Drill pilot holes then screw the hinges in place, using 35mm screws.

Step 8: Attach the knob to the front of the door.
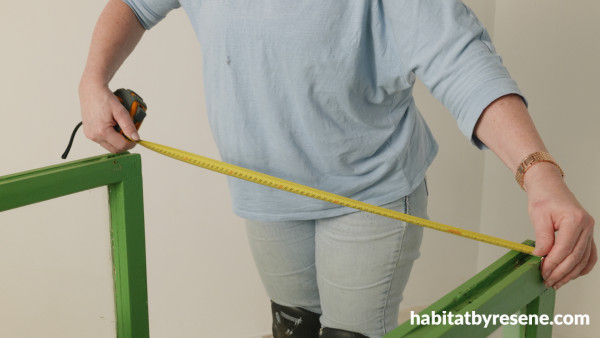
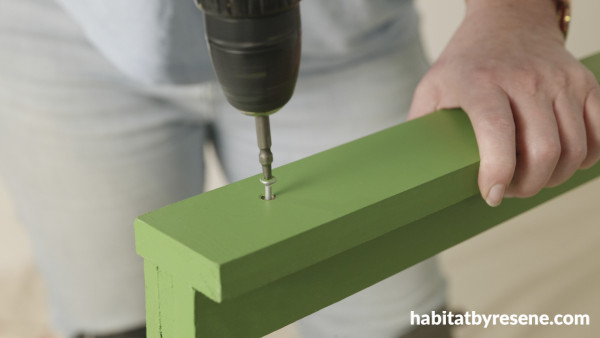
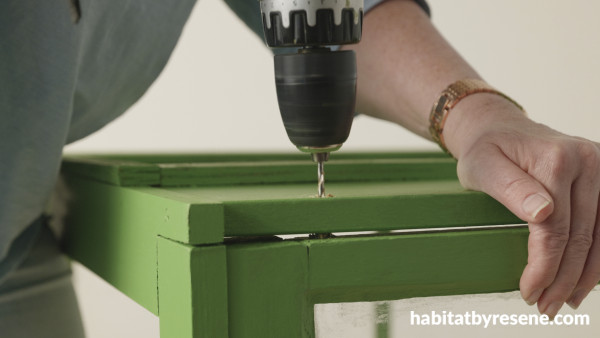
Step 9: Measure the width of the glasshouse and cut your offcut timber to the same width. Place it on top of the glasshouse at the front, just behind the door, and mark where the sides of the windows end.
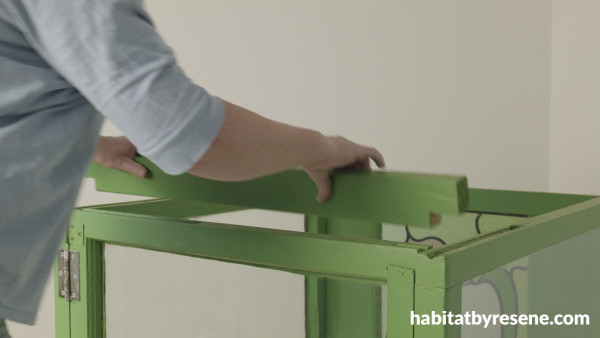
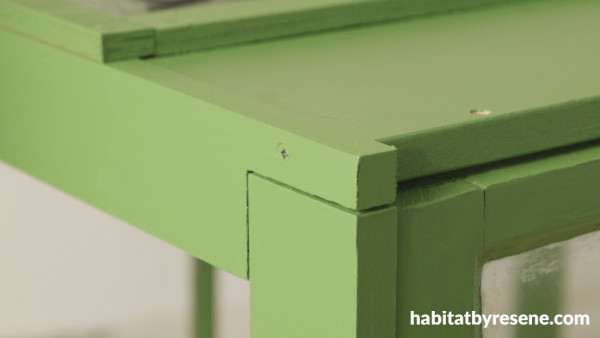
Step 10: Cut an indent about 20mm deep, and the width of the side windows, so that the timber drops about 20mm into the glasshouse. Drill pilot holes, then screw in place, at either end, with 75mm screws. Drill one screw in from the top and one from the side, on either side. This board acts as both a brace for the box frame and elevated support for the ceiling window. Apply two coats of your chosen Resene paint colour. We used Resene Bilbao.
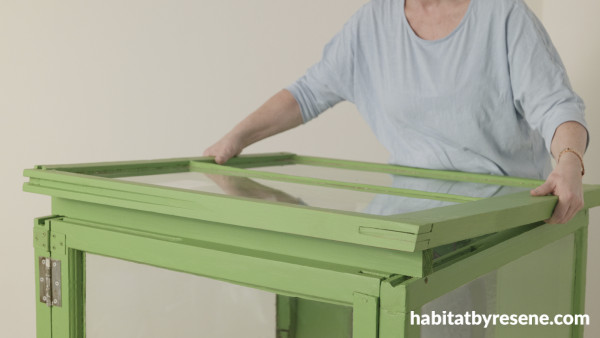
Step 11: Place the last window on top of the glasshouse. Drill pilot holes at each corner and, using 75mm screws, screw into place. Remove masking tape from windows and touch up paint if necessary.
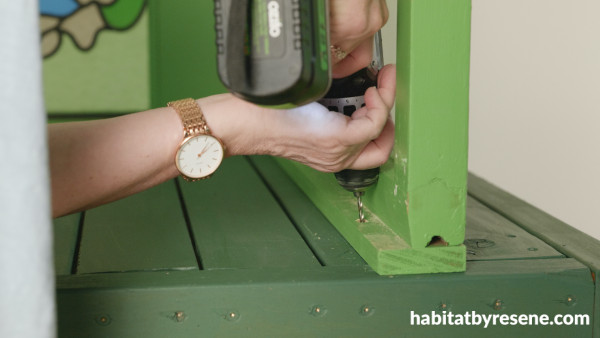
Step 12: Place the glasshouse onto the table and screw in place at the base using 50mm screws, two for each side and back.

Top Tip: For a natural stained finish, clean your timber frames with Resene Timber and Deck Wash and allow to dry. Then apply two coats of Resene Waterborne Woodsman in place of the paint.
project Jane Wrigglesworth
images Patrick Roberts
Published: 24 Oct 2023
more inspiration

Sturdy, comfortable and easy: Why Faded Denim is the colour of November
Color Marketing Group (CMG) have announced the latest hue that… more

Pot luck: A DIY terracotta table to top off your space
Transform a humble terracotta pot into a stylish, sturdy table… more

Try this DIY outdoor bench for a charming rustic feel
If you’re looking for a way to spruce up your… more

Authentic style, effortless design: Transform your home with Muros Wall Panels
If you love the look of authentic stone, brick or… more

Lundia: Customisable shelving for a personal touch
If you’re looking for functional yet stylish storage solutions with… more


 look book