
latest
habitat tv

Say goodbye to the morning scramble for keys, coats and sunglasses and hello to this… see this and more videos
blog

Heather’s triple blue bathroom makeover and colourful home
When Heather and her family moved into their home a few years ago, they knew… more
Making storage fun: How to make and paint your own DIY dog toybox
22 May 2025
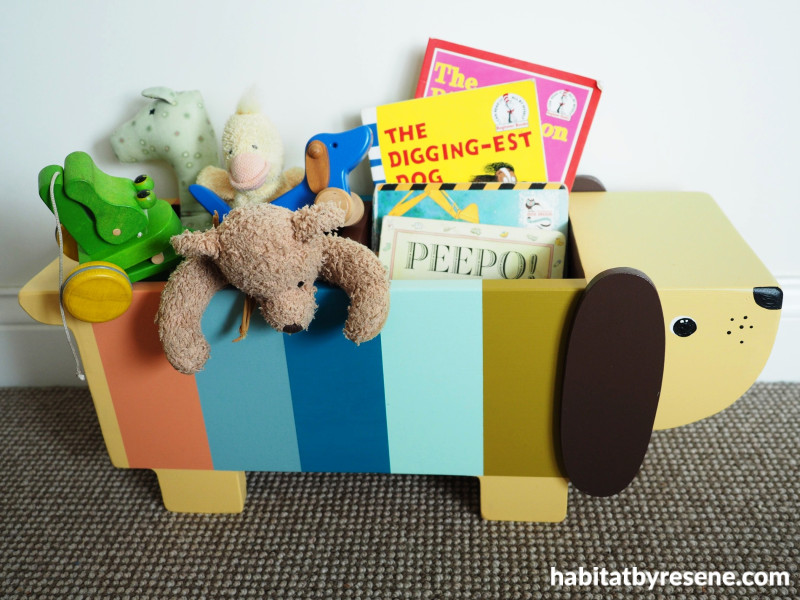
Home storage solutions don’t have to be boring, you can really make them into anything you want – like this fun DIY dog toybox painted in Resene testpots! This is a great one for the kids’ rooms, and it might even encourage them to clean up their toys. Bring them along with you to your local Resene ColorShop and they can help choose their favourite testpot colours.
You will need:
Untreated pine, 1.2m long x 23cm wide x 18mm thick
Untreated pine, 1.2m long x 18cm wide x 18mm thick
Untreated pine, 25cm long x 20cm wide x 10mm thick
Saw
Pencil
Jig saw or band saw
Sandpaper
Lint-free cloth
Wood glue
Electric drill
Hole filler
Paintbrush
Resene Quick Dry
Painters tape
Resene Aquaclear
Resene testpot paints in your favourite colours. We used Resene Laser, Resene Volcano, Resene Japonica, Resene Juniper, Resene Maestro, Resene Vista Blue, Resene Stinger, Resene Rebel, Resene Black and Resene Rice Cake
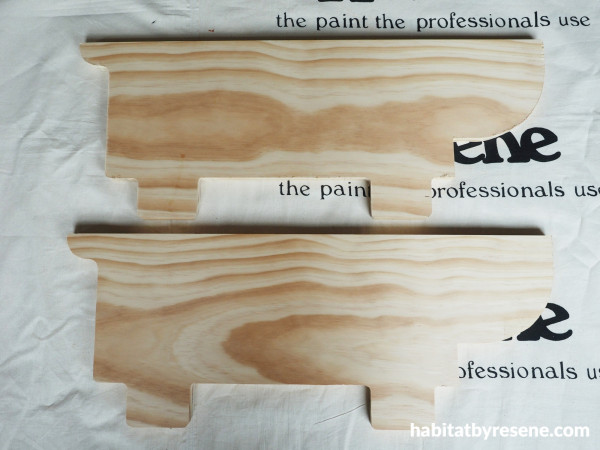
Step 1: Start by cutting the 1.2m long x 23cm wide pine board in half so that you have two lengths that are 60cm long. Use a pencil to draw on a dog shape and cut this shape out using a jig saw or band saw. Do the same for the other half of the board so that you have two identical dog shapes.
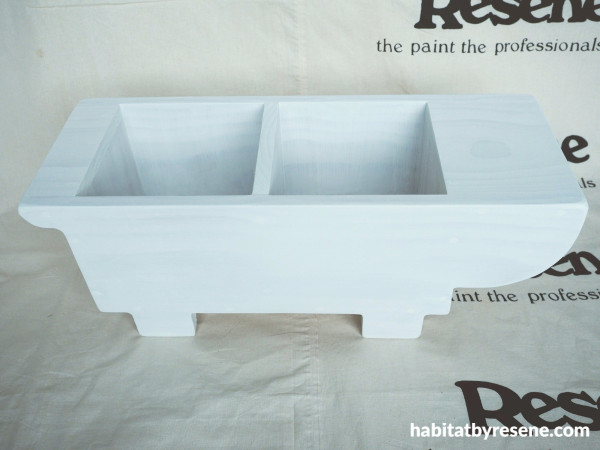
Step 2: With the 18cm wide board, cut it to length to make a bottom for the box, two vertical ends, two horizontal tops to go over the head and over the tail and a vertical partition in the middle. Use wood glue and screws to assemble the dog box together. Fill the screw holes over with hole filler and sand these smooth once dry. Sand all rough edges smooth, wipe off the sanding dust and paint the whole thing with one coat of Resene Quick Dry.
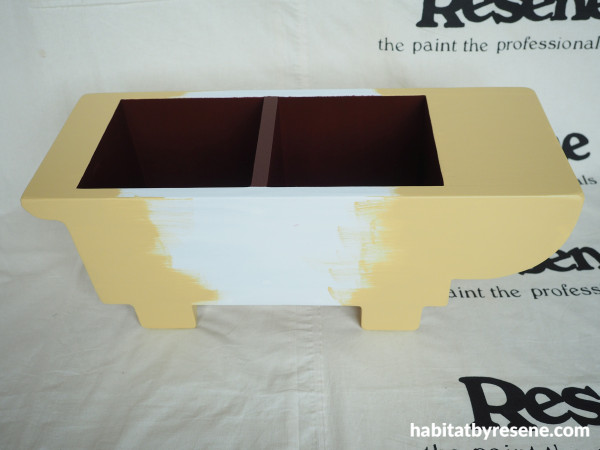
Step 3: Begin painting your dog toybox in your chosen Resene paint colours. Fleur used Resene Volcano for the two inside compartments and Resene Laser for the head, back and legs.
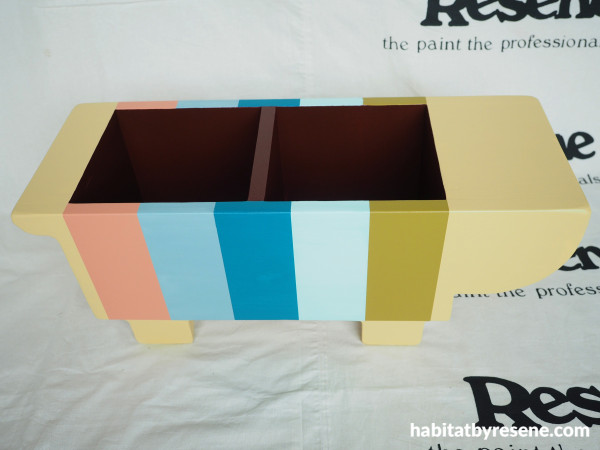
Step 4: Use painters tape to mark off the stripes on both sides of the dog and add more of your chosen paint colours. Fleur used Resene Japonica, Resene Juniper, Resene Maestro, Resene Vista Blue and Resene Stinger for her colourful stripes.

Step 5: Cut two long ear shapes out of some 10mm thick wood. Sand the edges and wipe off the sanding dust.Prime these with Resene Quick Dry and then paint with two coats of another of your chosen shades. Fleur used Resene Rebel for her ears. Glue these in place using wood glue. Paint on the eyes and nose in colours that you like. Fleur used Resene Rice Cake and Resene Black for this.
Top tip: For a higher sheen finish that is easier to wipe clear, paint over the whole thing with two coats of Resene Aquaclear clear waterborne urethanein a semi-gloss or gloss finish.
Wall painted in Resene Carrara and trims in Resene Rice Cake.
project and images Fleur Thorpe
Published: 22 May 2025
more inspiration

Flower power: Make your own colourful DIY stool
You might have some old furniture laying around at home… more

Three simple and unique DIY Mother’s Day projects
Mum is sure to love one of these three simple… more

The mood of May: Why this deep, vivid hue is the colour of the month
Color Marketing Group (CMG) have announced the latest hue that… more

How to play with black and white in home design
When it comes to home design, black and white is… more

Thoughtful and simple DIY Mother’s Day gifts
Looking for a way to show your appreciation this Mother’s… more


 look book