
latest
habitat tv

Say goodbye to the morning scramble for keys, coats and sunglasses and hello to this… see this and more videos
blog

Precision and vibrancy with artist Cap Jacobs
Cap Jacobs is a New Zealand-based artist whose work stands out for its precision, vibrant… more

How to make your own scrap wood table
07 Mar 2025
This clever table is a smart and stylish way to use up off-cuts of timber as well as leftover Resene paints and stains from your DIY projects - or you can create it from scratch using inexpensive timber strips and Resenetestpots. It works well as a foyer table for keys and phones or as a cool bedside table.
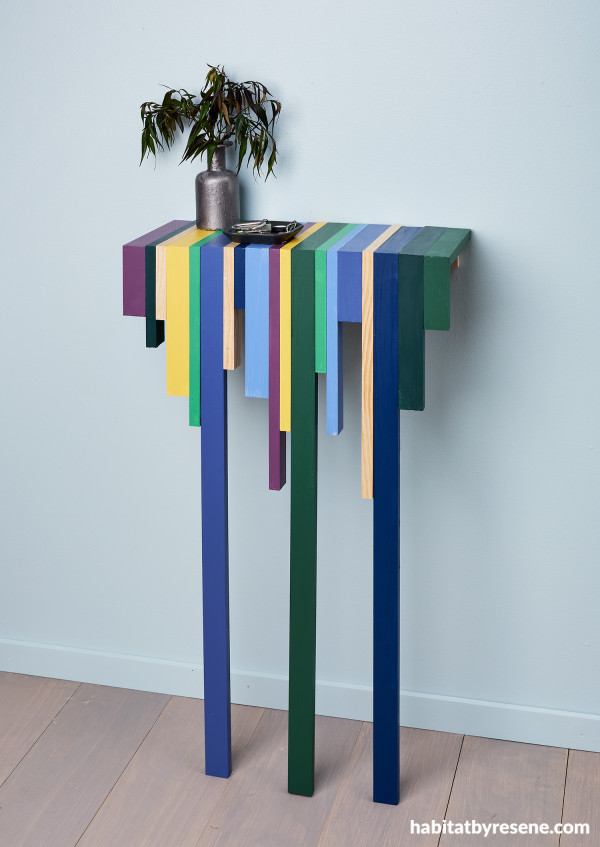
Wall painted in Resene Powder Blue, floor stain washed in Resene Colorwood Bleached Riverstone, table in Resene Top Notch, Resene Panorama, Resene Rulebreaker, Resene Sunbeam, Resene Fandango, Resene Ocean Waves, Resene Away We Go and Resene Permanent Green, vase in Resene FX Metallic Blast Grey 3 and tray in Resene Zeus.
You will need:
Mix of wood offcuts, we used about 11metres of 40mm x 18mm timber to make a table that was approximately 420mm wide by 900mm high and 250mm deep, but the beauty of this project is it can be customised to the space you have to fill and the offcuts of timber you already have at home.
Pencil
Ruler
Wood glue
Sandpaper
Paintbrush
Your chosen Resene paint for painting or staining the wood offcuts. We used Resene Top Notch, Resene Panorama, Resene Rulebreaker, Resene Sunbeam, Resene Fandango, Resene Ocean Waves, Resene Away We Go and Resene Permanent GreenThis is a great project for also using up Resene paint from your recent projects or testpots.
4x 50mm timber screws to secure the table against the wall
Cut plan:
For the tabletop lengths of timber:
9 x 25cm lengths cut on a 45-degree angle so the 40mm width sits flat
10 x 25cm lengths cut on a 45-degree angle so the 18mm width sits flat
For the front legs and drops of timber:
3 x 900mm x 40mm x 18mm
3 x 100mm x 40mm x 18mm
3 x 250mm x 40mm x 18mm
2 x 400mm x 18mm x 40mm
3 x 300mm x 18mm x 40mm
3 x 200mm x 18mm x 40mm
2 x 100mm x 18mm x 40mm
Piece of timber to use as a wall bracket – we used a piece that was 420mm x 20mm x 20mm
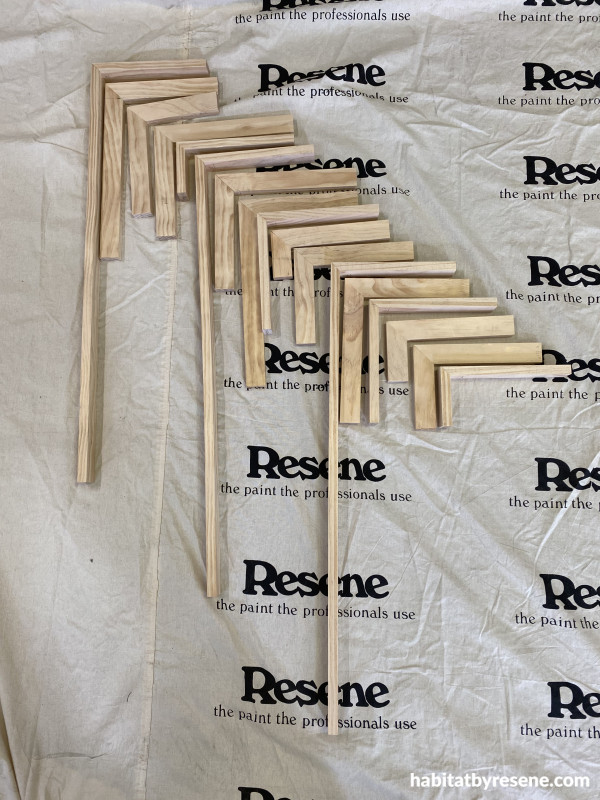
Step 1
Measure your 250mm tabletop lengths and cut a 45 degree angle at one end. Remember when cutting this 45-degree angle you are creating a45-degree angle for the next piece.
Each length of timber should have a 45-degree angle cut and on the opposite end a straight edge cut.
To ensure the matching pieces are exactly the same size, for example the pieces for the tabletop, cut one then use it as a guide to cut the matching pieces.
Cut the pieces for the front drop pieces including the longer lengths that will act as table lengths. Again, ensure that one end has a 45 degree angle and the opposite end has a straight cut to sit on the floor where needed. Sand any sharp edges with sanding paper and wipe off the sanding dust.
Layout the top pieces and marry them up to adjoining drop or table leg pieces to form your desired pattern. To remember which pieces go together, number them with pencil at the straight edge ends as you don’t need to paint or stain the ends.
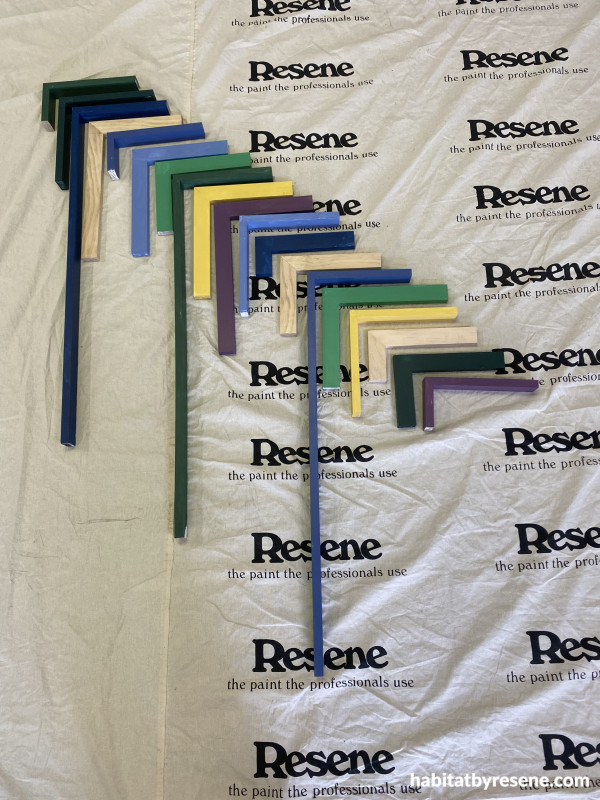
Step 2
Glue each pair of timber lengths together along their 45-degree angle cuts, use masking tape to keep the pieces in place while the glue dries. Lay the pieces on their side on a large flat surface so they are not under strain while the glue dries.
Paint each length with your chosen Resene paint or stain if you would prefer a stained timber finish.
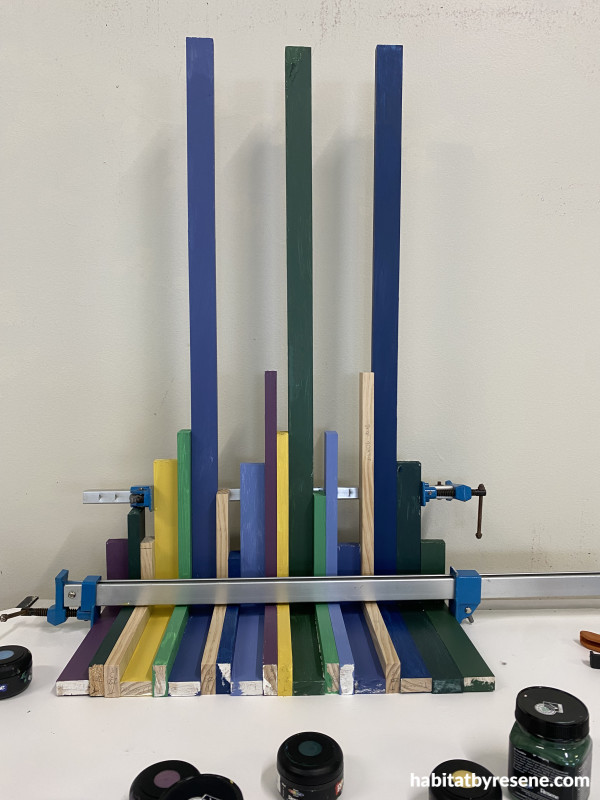
Step 3
To glue each section of timber together, turn the tabletop piece upside down on a flat surface to ensure the table has a level top and glue along the joining edges. If you have clamps use them to keep the pieces together or use masking tape.
Step 4
On the length of timber that will be used as a wall bracket, drill pilot holes for the screws that will attach it to the wall.
Attach the wall bracket length of wood to the under side of the table at the ends that will rest against the wall.
Line up the table against the wall with the longest timber drops resting on the floor. Ensure you have someone holding the table steady while you screw the timber wall bracket to the wall.
Top tips:
If your home has a more subdued colour palette, paint your table in a mix of colours that are already in your room to help it belong.
Mix up your finishes for extra interest. You could try Resene FX Metallic for a metallic effect or do some parts in paint and some paints in ReseneColorwood stain.
For extra pop of the colours and to make your table even easier to wipe clean, use Resene Concrete Clear gloss on top. This will give you a gloss look finish.
You can use this table idea outside too – either using a painted finish or Resene Waterborne Woodsman for a stained finish.
Credit:
Wall painted in Resene Powder Blue, floor stainwashed in Resene Colorwood Bleached Riverstone,table in Resene Top Notch, Resene Panorama, Resene Rulebreaker, Resene Sunbeam, Resene Fandango,Resene Ocean Waves, Resene Away We Go and Resene Permanent Green, vase in Resene FX.
project LauraGrace MacFarland
images Bryce Carleton
Published: 07 Mar 2025
more inspiration

Three simple and unique DIY Mother’s Day projects
Mum is sure to love one of these three simple… more

The mood of May: Why this deep, vivid hue is the colour of the month
Color Marketing Group (CMG) have announced the latest hue that… more

How to play with black and white in home design
When it comes to home design, black and white is… more

Thoughtful and simple DIY Mother’s Day gifts
Looking for a way to show your appreciation this Mother’s… more

Three ANZAC DIY projects to create a thoughtful tribute
Anzac Day is a national day of remembrance in New… more


 look book