
latest
habitat tv

Say goodbye to the morning scramble for keys, coats and sunglasses and hello to this… see this and more videos
blog

Reader roundup: School art, re-used paint buckets and fresh exteriors
We’ve got a great mix of projects to show you this month. We absolutely love… more
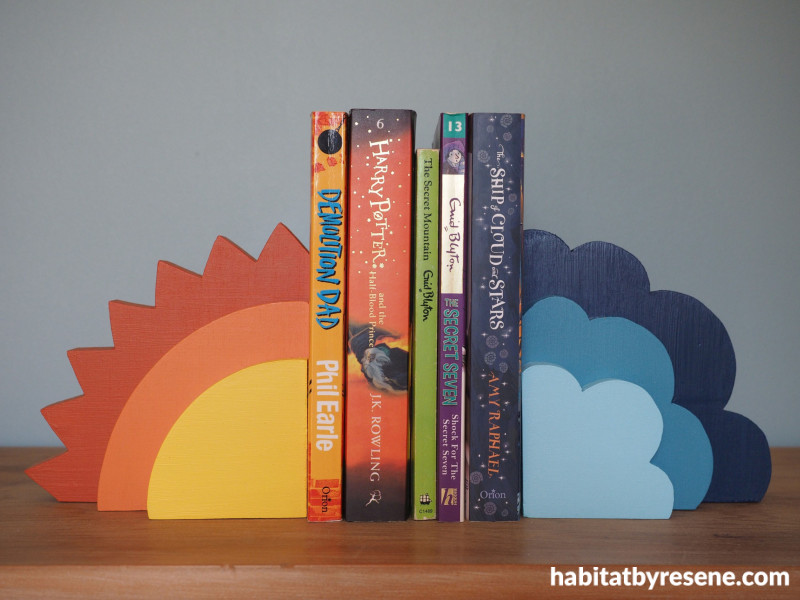
Sunny side up: Bookends for any weather
11 Apr 2024
Brighten up your bookshelf and organise your books at the same time with these colourful bookends. This is a great DIY for both adults and children. You can use your most favourite and brightest Resene shades or paint them to match your existing décor.
You will need:
- Wood, untreated pine, 900mm long x 150mm wide x 18mm thick
- Pencil
- Jig saw or band saw
- Sandpaper
- Paintbrush
- Resene Quick Dry
- Wood glue
- Resene testpots in your favourite colours. Fleur used Resene Refresh, Resene Calypso, Resene Ocean Waves, Resene Bright Spark, Resene Smoke Tree and Resene Fire
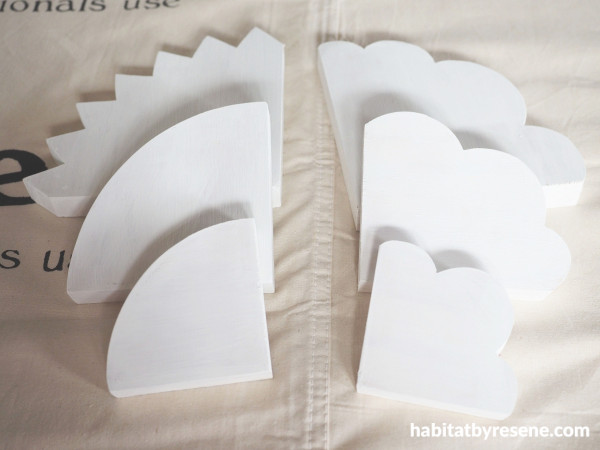
Step 1: Use a pencil to draw on the wood, three sun and three cloud shapes. A drawing compass can be handy for the sun shapes. Use a jig saw or band saw to cut them out. Sand any rough edges smooth and wipe off with a damp cloth. Prime with one coat of Resene Quick Dry.
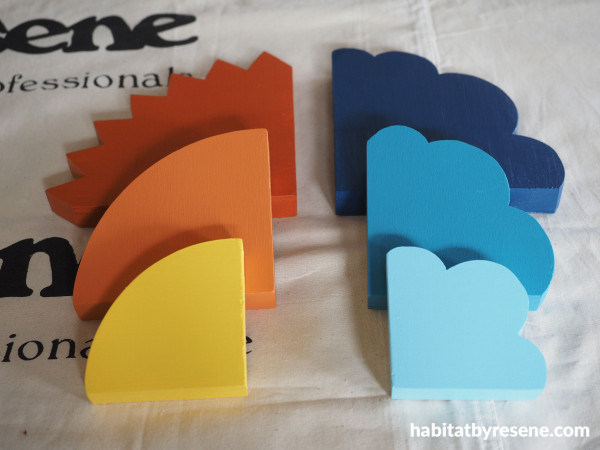
Step 2: Once the primer is dry, paint all of your shapes in your chosen Resene paint colours. Fleur painted the smallest sun in Resene Bright Spark, the middle sized sun in Resene Smoke Tree and the largest sun in Resene Fire. For the cloud shapes, she painted the smallest in Resene Refresh, the middle cloud in Resene Calypso and the largest in Resene Ocean Waves.
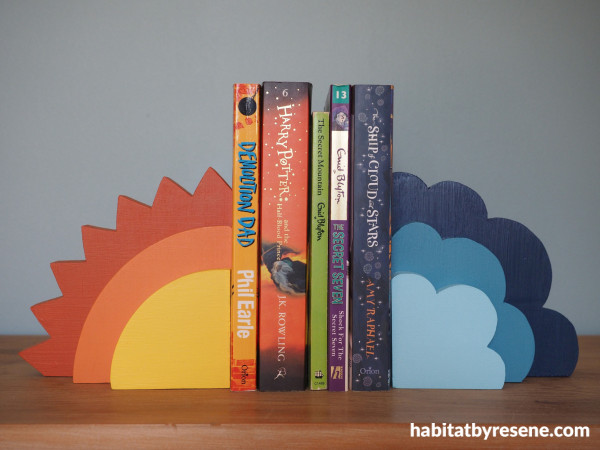
Step 3: Once the paint is dry, use some wood glue to glue the sun shapes together and the cloud shapes together.
Wall painted in Resene Destiny.
project and images Fleur Thorpe
Published: 11 Apr 2024
more inspiration

Glow and behold: DIY lampshade food covers
Give your outdoor dining setup a stylish twist with these… more

Unlock your kitchen’s potential with Blum and Resene
When planning your dream kitchen, the first thing that comes… more

Grind it your way: DIY salt and pepper
Why settle for plain salt and pepper grinders when you… more

Favourite finds: Embrace coastal elegance with our top product picks
Welcome to a new year of Favourite Finds. Each month… more

The leaning tower of books: DIY book holder
Add a pop of personality to your home with this… more


 look book