
latest
habitat tv

Say goodbye to the morning scramble for keys, coats and sunglasses and hello to this… see this and more videos
blog

NZ Walking Sticks: A personalised touch for comfort, independence and style
Carey Hablous, retiree and founder of NZ Walking Sticks, is changing the game when it… more
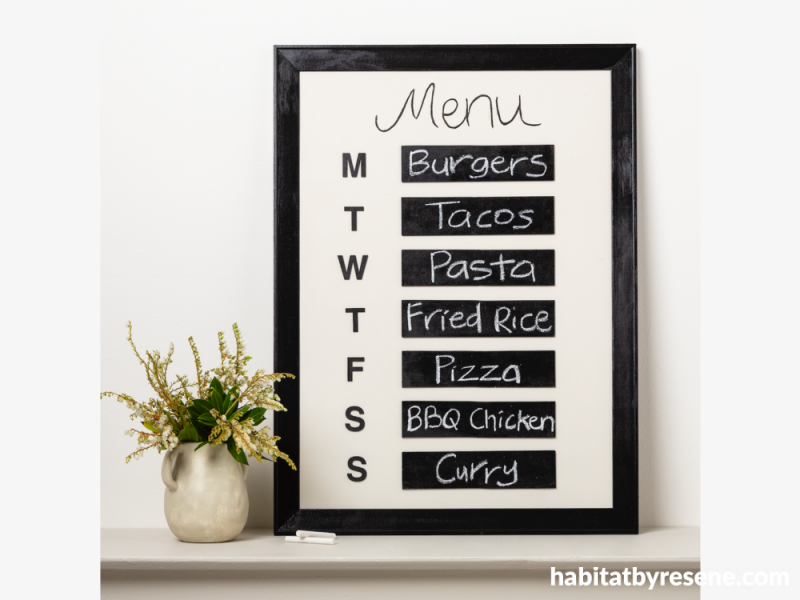
What’s for dinner? Plan out your week with this DIY menu
05 Jun 2024
Keep everyone in the family in the loop with what the meals are for the week with this DIY menu board. A neutral design like this will suit any kitchen, but you can also use your most colourful and favourite Resene testpot colours too!
You will need:
- 1x large upcycled or new picture frame (ours is 77cm in height and by 57cm wide)
- Wooden letters for days of the week
- 3 square MDF placemats
- Wood glue
- Chalk
- Pencil and ruler
- Fine paintbrush
- Jigsaw
- Resene FX Blackboard Paint
- Resene testpot brush
- Resene testpots in your choice of colours. We used Resene Half Fossil and Resene Black
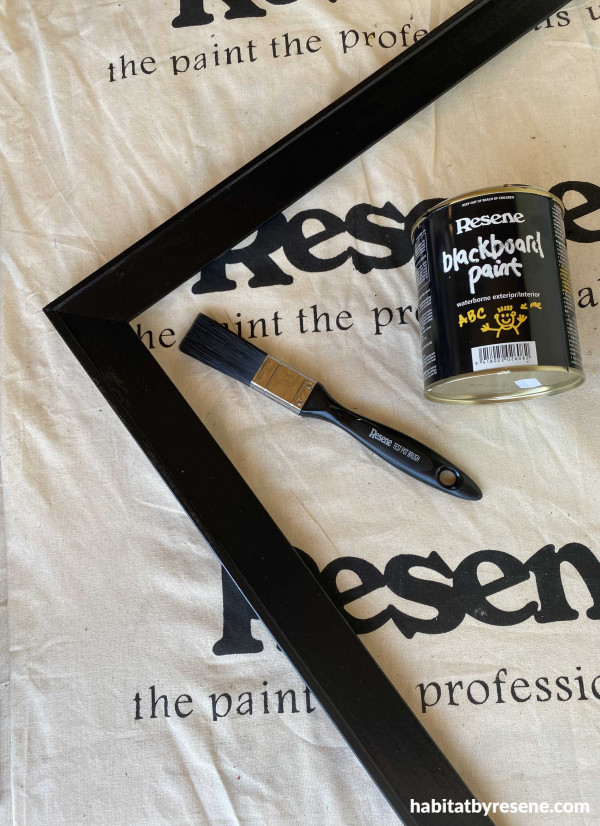
Step 1: Take your frame and remove the glass so you just have the backing board and frame. Paint the frame and wooden letters in your chosen Resene colour. We used Resene Black.
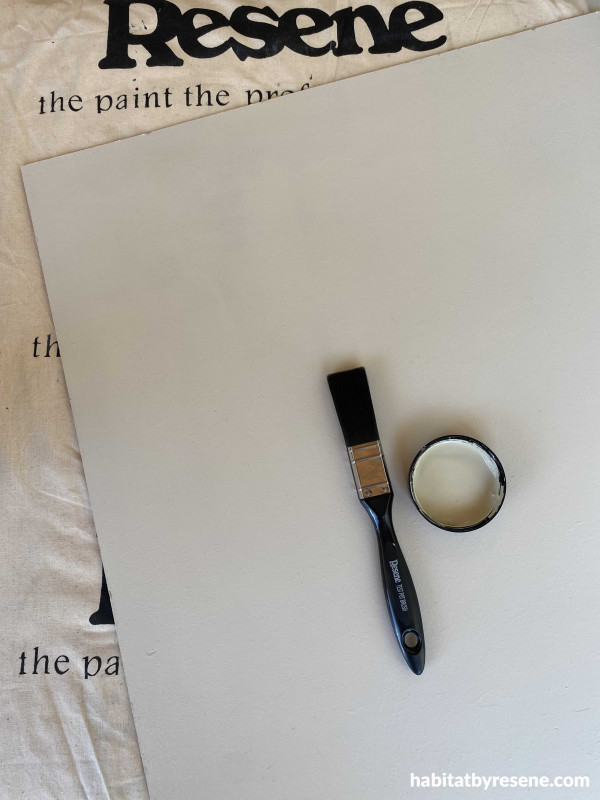
Step 2: Paint the backing board of the frame in your other chosen shade. We used Resene Half Fossil.
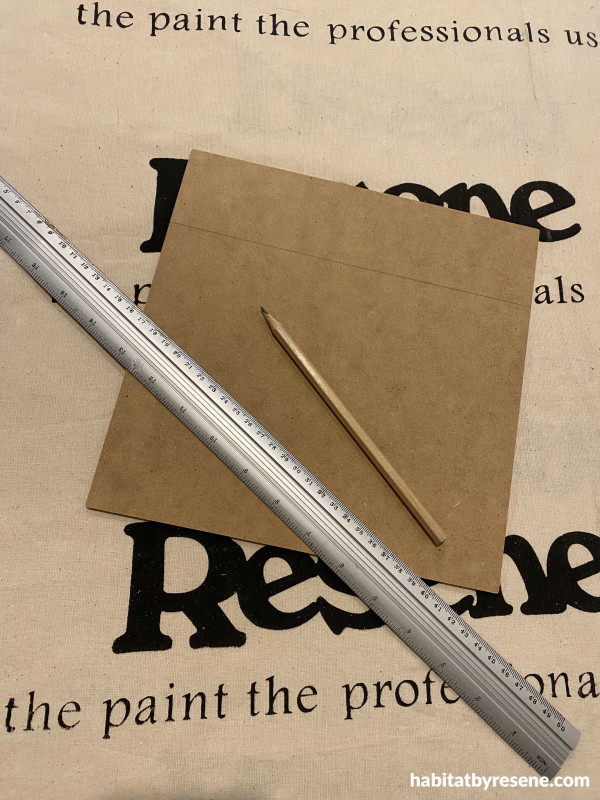
Step 3: Take your square wooden placemats and mark out on each 5.5 cm wide and 24.cm in length. You will need 7 pieces of wood, one for each day of the week.
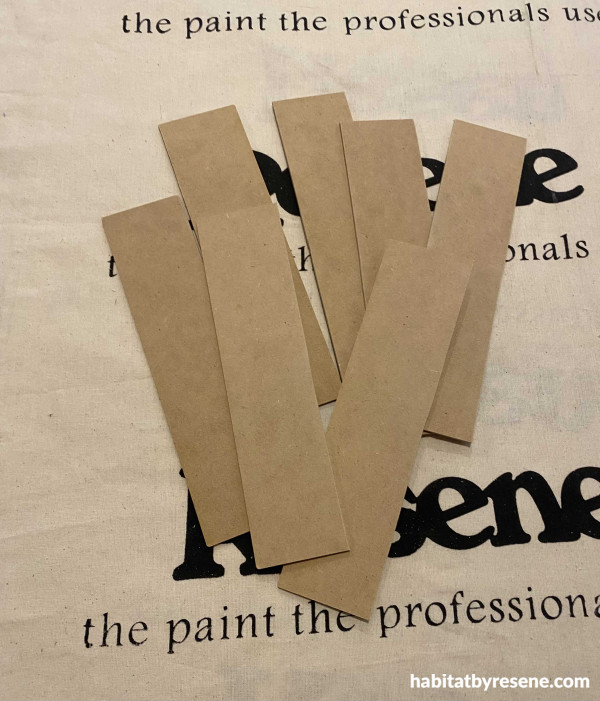
Step 4:Using a jigsaw cut the wooden placemats so you end up with seven strips of wood.
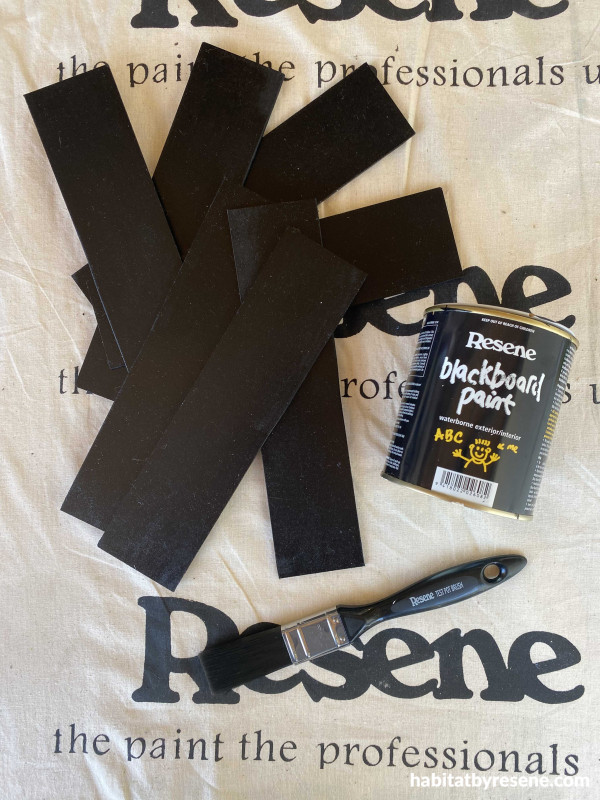
Step 5: Paint your wooden strips in Resene FX Blackboard Paint.
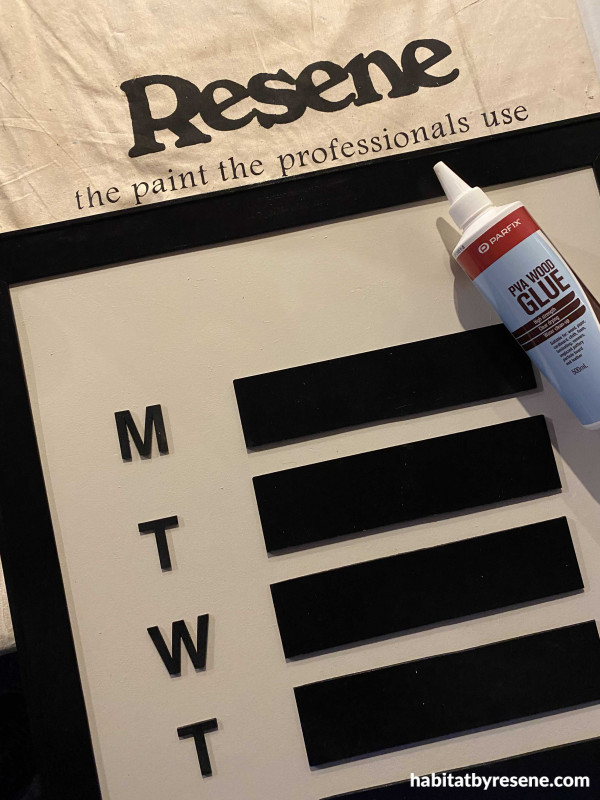
Step 6: Pop the backing board back into the painted frame and glue the wooden strips and wooden letters onto the board.
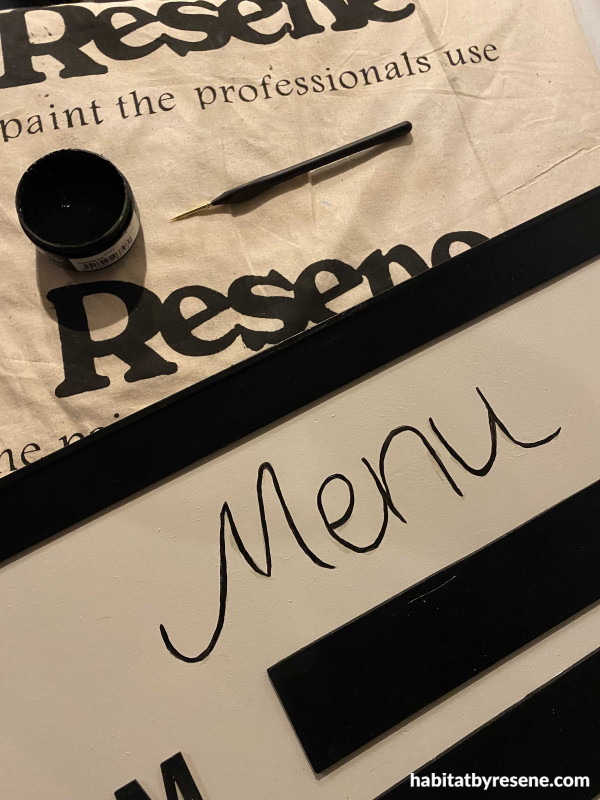
Step 7: Use a pencil to write the word ‘menu’ on the board and then paint over the letters using a fine paintbrush in your chosen colour. We used Resene Black.

Step 8: Hang your menu in the kitchen or place on a console table near the kitchen. Write up your meals in chalk and save yourself the endless questions of ‘what’s for dinner?’
Wall painted in Resene Rice Cake and vase and console table in Resene Fossil.
project Vanessa Nouwens
images Bryce Carleton
Published: 05 Jun 2024
more inspiration

A coastal canvas: How to create your own summer scene screen
Bring a slice of summer into your space with this… more

Serving up style: How to make your own fruit flower trays
Brighten up your serving game with these fun and fruity… more

Step it up! DIY walking blocks for fun and balance
Winter isn’t here yet so make the most of the… more

Let there be light: How to make your own DIY solar lighthouse
Transform your garden into a coastal-inspired retreat with these charming… more

How to make your own scrap wood table
This clever table is a smart and stylish way to… more


 look book