
latest
habitat tv

Say goodbye to the morning scramble for keys, coats and sunglasses and hello to this… see this and more videos
blog

Relax into the vibrant tones of autumn with Resene and nood
With autumn’s arrival comes an invitation to unwind and indulge within the comforts of your… more
Crafty dining: DIY table runner
08 Nov 2023
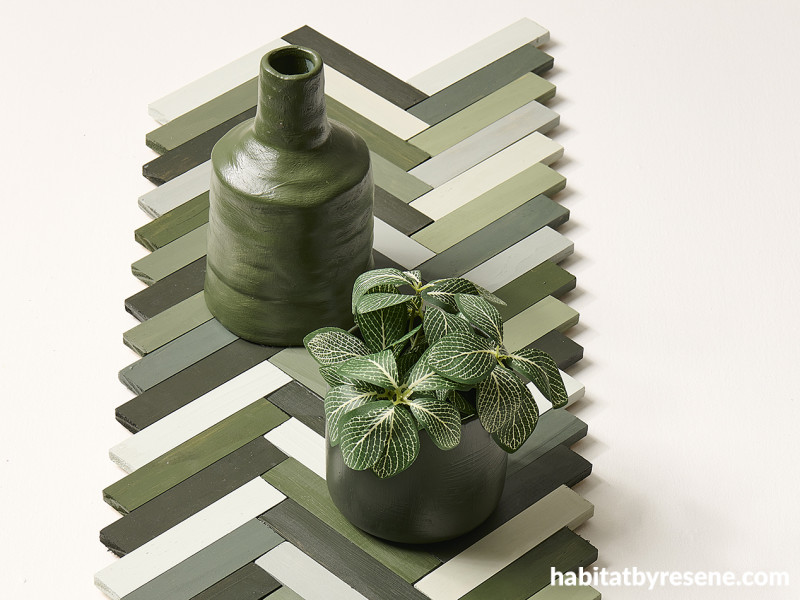
Create a vibrant and personalised touch for your dining space with this DIY table runner using your favourite Resene colours. By combining a few essential materials like MDF board, pine wood and a selection of Resene testpot colours, you'll transform your table into a work of art that will not only enhance your dining setting but also serve as a stylish focal point. Create our green themed table runner or paint yours to match your home’s colour scheme for a cohesive and stylish look!
You will need:
- 1x piece of MDF board, 1m long and 27cm wide
- 6x lengths of pine, 1.8m long, 3cm wide, 1cm thick. Cut to 69 pieces of pine which are 15cm long
- Glue (glue gun, clear or pva craft glue or super glue)
- Jig saw or handsaw
- Pencil
- Tape measure
- Sandpaper (optional)
- 9 x Resene testpot colours of your choice. We used Resene Marshland, Resene Cabbage Pont, Resene Green Spring, Resene Paddock, Resene Ravine, Resene Mangrove, Resene Black Forest, Resene Olive Green and Resene Pumice.
- Testpot paintbrush

Step 1: Mark your wood to the desired lengths specified above.
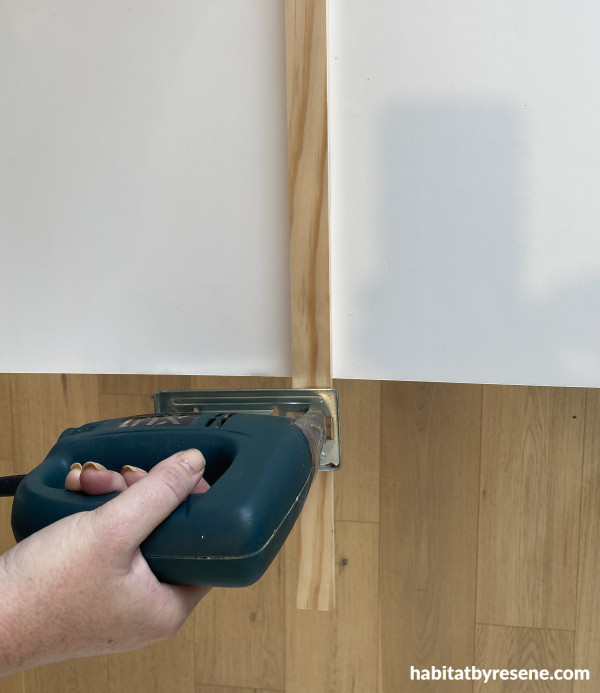
Step 2: Cut your wood using a jig saw or handsaw, then sand the edges to get a smooth edge. Wipe off all sanding dust.
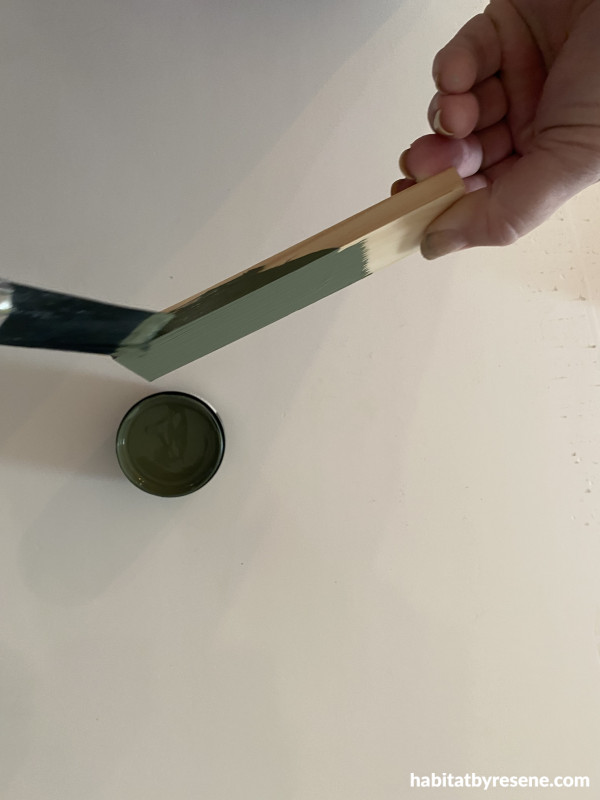
Step 3: Paint the wood pieces in your chosen Resene paint colours. We used Resene Marshland, Resene Cabbage Pont, Resene Green Spring, Resene Paddock, Resene Ravine, Resene Mangrove, Resene Black Forest, Resene Olive Green and Resene Pumice. Apply at least two coats for best coverage.
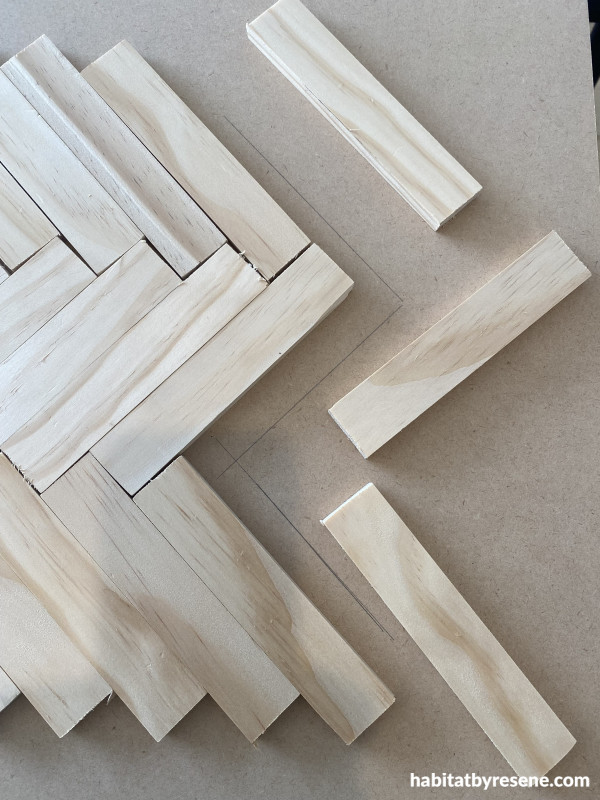
Step 4: Lay your pieces of wood out on top of the MDF board in the herringbone pattern. Remove the last three pieces of wood at either end and draw a pencil outline 1cm out from the remaining blocks on the MDF board. Repeat at both ends. To complete the outline of the MDF board draw a pencil line down each side connecting the lines you have drawn.
Note: The MDF board that will sit underneath the wooden pieces will be smaller than the top design, this is so you don’t see it once finished.
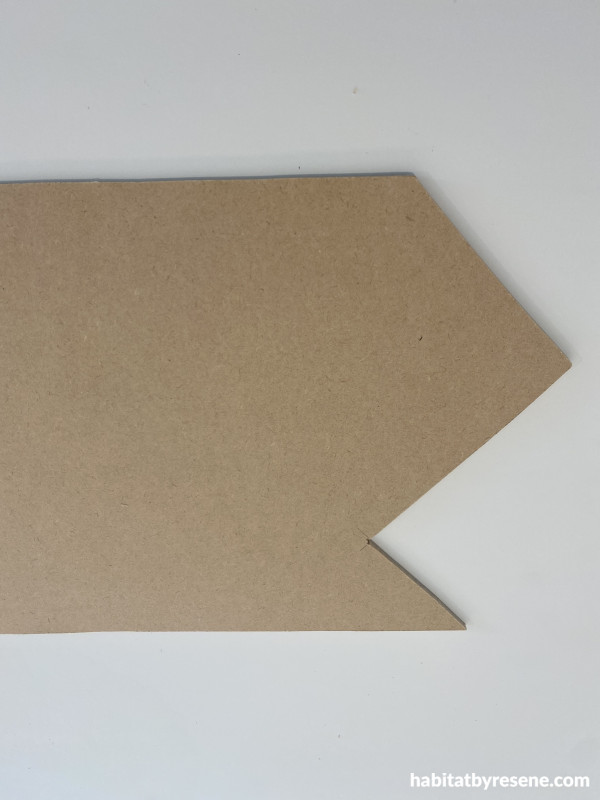
Step 5: Using a jig saw, cut the MDF board to the shape you have drawn.
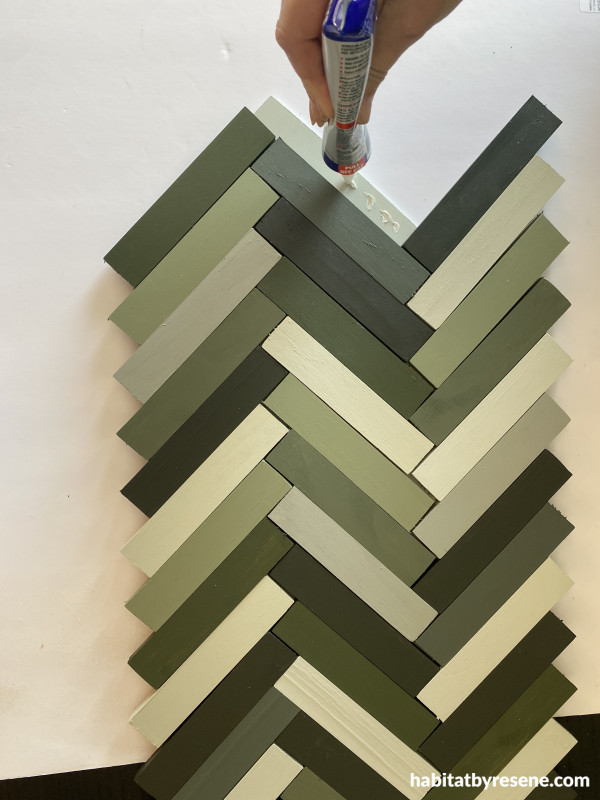
Step 6: Lay out all the wood pieces on top of the MDF panel in your preferred colour way, then glue each piece one at a time.
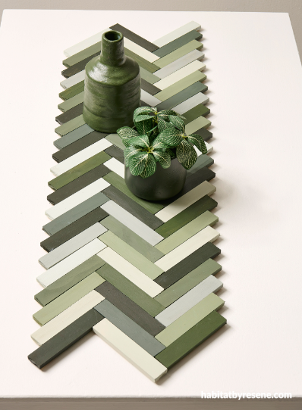
Step 7: Place on your dining table and add a vase or pot plant when not in use or use to place hot dishes on a table.
Table painted in Resene Rice Cake and vase and plant pot painted in Resene Mangrove.
project Vanessa Nouwens
images Bryce Carleton
Published: 08 Nov 2023
more inspiration

Prickly perch: A DIY cactus key holder
Looking to add a touch of whimsy and functionality to… more

Hues on the move: A DIY rainbow mobile
Get ready to add a vibrant touch to your nursery,… more

Show your support this ANZAC Day with this DIY wreath
Anzac Day is a national day of remembrance in New… more

Sunny side up: Bookends for any weather
Brighten up your bookshelf and organise your books at the… more

A roar-some dish: DIY animal plates
Impress your guests with these DIY animal plates! The Resene… more


 look book